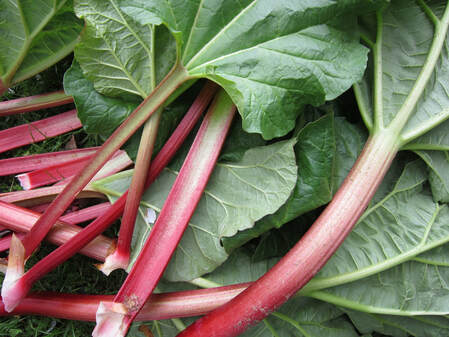
rhubarbRhubarb has finally made its way back into my kitchen, and I am super pumped to share with you how I use rhubarb. Yes, it's often used in sweet preparations, but I'm here to share other fun ways to enjoy it in savory dishes. Before I delve into the recipes, let's begin with rhubarb basics: Rhubarb is a member of the knotweed family, which includes sorrel and buckwheat. Years before you or I were on this planet, rhubarb was found in China, Russia, Mongolia, and other parts of Central Asia. Traded originally as a luxury good, many sought out for its use as a detoxifying agent and curative herb. Choose firm, red stalks over green ones. The green lends itself to sour notes. When preparing rhubarb, first remove the large green leaves. They are extremely high in oxalic acid, which is poisonous and toxic to humans and some bugs when eaten in large amounts. The leaves can be used in insecticides, so if you have critters to fend off in the garden, explore its use as a DIY insecticide. Store in a bag wrapped in a towel inside the refrigerator for up to 1 week to prevent them drying out. Not going to use them within the week? Freeze it! Instead of storing in the refrigerator, simply cut the cleaned rhubarb into small, even pieces. Put in a freezer bag and close. Make sure all air is emptied and freeze for up to one year. In the kitchen, rhubarb requires balance dues its strong tartness, which is typically with sugar. Apart from the obvious uses like pie, bars, jams, and other desserts, try them pickled, in a porridge or stir-fry, as a compote, braised, or as a savory sauce over meat or fish! Tartness can vary from stalk to stalk. If possible, start with less sugar and gradually add more along the way. rhubarb nutritionAccording to the USDA National Data Base, 1 cup roughly provides: 25 kcal, 1g protein, 5.5 g CHO (2 g fiber), and is high in (5%) calcium, (5%) potassium, (8%) vit C, magnesium, and phosphorous, (22%) vitamin K. 
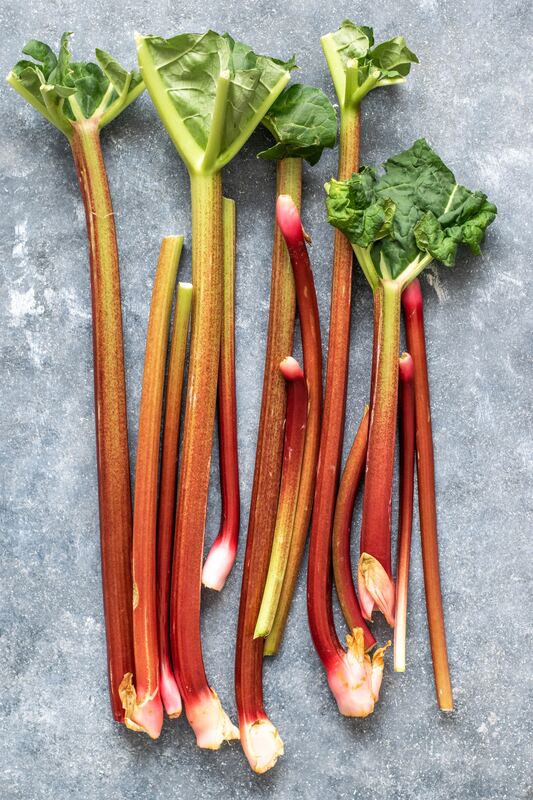
the recipesRamp & Rhubarb Chutney Makes roughly 1 ½ cups: serve with grilled cheese, use as a side on a cheese plate, or serve along spicy Indian food with naan. Ingredients: 1 Stalk of rhubarb, chopped 6 to 7 stalks of ramps, chopped 3 tablespoons brown sugar 3 to 4 tablespoons granulated sugar 1 teaspoon coriander 1 teaspoon cumin powder ¼ teaspoon salt 1 teaspoon Fresh Black Pepper ⅓ cup White Wine 1 teaspoon White Distilled Vinegar Directions
Rhubarb Relish Serve alongside split pea croquettes (or any vegetable croquette for that matter) or grilled meat/fish. Prep time: 20 minutes Cook time: 1 ½ hours (includes chilling time) Yield: approximately 8 cups Ingredients: 8 cups chopped rhubarb 8 cups onions, thinly sliced 7 cups granulated sugar 3 cups cider vinegar 2 tsp salt 2 tsp ground cloves 2 tsp ground cinnamon Directions: 1. Chop rhubarb into rough dice; set aside. 2. Add onions to separate bowl. Cover with boiling water; let sit for 5 minutes. Drain and discard water. 3. In heavy-bottomed pot, dissolve sugar in cider vinegar on medium heat. Add onions, rhubarb, salt, cloves and cinnamon. Stir well. Cook, stirring often, until it reaches a thick jam-like consistency, 40 minutes to 1 hour. 4. Remove from heat; let cool. Place in jar and refrigerate. Pickled Rhubarb Makes about 1 cup. This goes great in a simple shaved asparagus salad, in a taco, or on a pickle plate with other accoutrements. Ingredients: 2 rhubarb stalks, sliced on a diagonal 1 cup red wine vinegar 1/2 cup sugar 1 1/2 teaspoons kosher salt, plus more 2 teaspoons pink peppercorns 1 teaspoon fennel seeds Directions:
Check out a couple tasty sweet treats using rhubarb like outlaw bread pudding and raspberry rhubarb galette.
0 Comments
Dorayaki, simple and sweet, best enjoyed with a cup of green tea
Lately, I've been exploring various Japanese foods. Looking for breakfast, one recipe in particular one stood out: Dorayaki. It's appeared in cooking shows, and recently featured in Tasting Table, so I began to grow curious: What was all the hype about? It is just a pancake, after all. Right?
Wrong. Dorayaki is not just any pancake. It's one of the most popular Japanese confections, filled with anko, a sweet adzuki red bean paste, sandwiched between two pancakes. You heard me. Two pancakes! But they're small. Typically, the pancakes are quite sweet, so I cut out a lot of the sugar; I don't do well with things that are overly-sweet, especially at breakfast. But if you're looking for the full-on, sweeter pancake made as intended, add the full amount (using 1/2 cup sugar instead) from the recipe below. To make things interesting, I chose to make three different fillings. It was too difficult to choose just one: I was initially interested in trying the traditional bean paste version, but couldn't say no to a matcha green tea variation as well. It was around this time that I also noticed the abundance of ripe squash sitting on my kitchen counter, and decided to make a butternut squash filling for a third option. Before you get off your seat to make some tasty sweet cakes, check out this clip from the popular manga-turned-anime-series Doraemon to get the full sense of what it's like to love dorayaki, below. ... and now the recipe: Dorayaki
Pancake ingredients:
1 1/2 cup all-purpose flour 1/4 tsp baking soda 2 eggs 1/4 cup sugar 1 tbsp honey 3/4 cup milk* 1-2 tablespoons butter 8 oz filling *Can use animal or plant-based milk Directions: 1. Mix dry all-purpose flour and baking soda in one bowl with a whisk. In a second bowl, whisk together eggs, honey, and milk. 2. Gradually whisk the wet ingredients into the dry. 3. In a nonstick pan, apply a small amount of butter. Ladle in a some of the batter into a circle and repeat. Flip after 2 minutes, or until golden brown, and cook the remaining side for 1-2 minutes. The idea is to make them snack worthy and be consistent in shape and size. 4. Work in batches until the batter is finished. 5. In the middle of one pancake place a dollop of filling in the center. Place another pancake on top and press along the edges to create a seal, enclosing the filling. It's OK if some of the filling seeps out, messy can be good sometimes. Dorayaki filling recipes
Adzuki bean paste filling:
1 cup adzuki beans 1/8 cup sugar Directions: 1. Soak beans overnight or for 8 hours. 2. Drain, rinse, and cover with water. Cook for about 45 minutes or until softened. 3. Puree beans in a food processor. 4. Heat a frying pan and add bean puree with sugar. Cook until all it's dry and there's very little to no moisture.
Matcha cream cheese filling:
1/8 cup honey 2 tbsp matcha green tea 8 oz softened cream cheese Directions: 1. In a food processor, combine all ingredients until well-mixed.
Miso pumpkin filling:
2 cups squash, skinned, seeds and guts removed, roughly chopped 1 tbsp yellow miso Directions: 1. In a pot, combine squash with enough water to cover. Cook for about 10-15 minutes until soft. 2. Puree squash and add miso. Still hungry? Check out the miso carrot spread (within the napa cabbage wrap recipe) for another alternative filling. for the love of tomatoes
Conditions are finally perfect. Not only because the tomatoes are abundantly in season, but also because the weather has turned cool and comfortable - ideal for canning/preserving. Long hours spent over a hot stove in the kitchen is a much more enticing, and bearable, proposition after the sweltering heat of summer has been tamed by the first days of September.
Another pro? This time of year is also when you'll find the the best deals, Your local farmers market should be the first place you visit to purchase tomatoes in bulk. Quarter and half bushels ($15 on average for a quarter) are going to be most affordable and freshest, with a higher nutrient content than what you'll find at the average grocery store. Each year, I make around a half bushel of tomato preserves in various forms: whole tomatoes, quartered tomatoes, peeled tomatoes. Hot pepper tomato jelly, and tomapple (tomato, apple) jam. And, of course, a few eaten fresh. It can take several hours to process tomatoes, but more than worth your time. Something new I tried this year: dehydrate the tomato skins and, then grind them into a powder. A dash of flaked lycopene (aka tomato skin) is a great addition to garnish soups, stews, grain bowls, even popcorn, or anything else that could use that little extra something. And, while time-consuming, peeling tomatoes is super easy. It can be somewhat dangerous, however, if you're impatient like myself. The heat from the tomatoes after blanching is boiling hot. Wear gloves, tough it out, or wait until they cool down (can put in an ice bath) How to peel tomatoes
1. Score the tomatoes by marking an 'x' using a knife on the butt of the tomato.
2. Bring a large pot of water to a boil and blanche the tomatoes for 30-60 seconds. 3. Remove tomatoes from water, allow to rest and cool (optional). 4. Peel tomatoes from scored end towards the crown. 5. Dehydrate skins or toss 6. Process tomatoes processing tomatoes
Once you've got those tomatoes peeled, you're ready for canning. It's super easy, but, as I mentioned before, is time consuming. The more often you do it, the quicker and more efficient you will become. There are two methods you can follow: One uses a boiling water method, and the second utilizes pressure canning.
Prepares 2 each 3/4 lb glass jars. Double, triple, multiply accordingly what you need
directions
This recipe is a modification of an original Ball® Fresh Preserving recipe.
Give it a try, and let me know what you think! Share pictures and all your stories here. Or have your own favorite way to use tomatoes during this perfect time of year? I'd love to hear about it as well.
And, if you're looking for ideas, check out my pickled watermelon rinds for another unique preservation recipe. a friend's Mexican fiesta
Inspired by Nopalito: A Mexican Kitchen, this month's cookbook from my club held at SubText, I gathered some friends for a fiesta of our own. The morning of, I awoke with a taste for smothered chiles and spiced beans between sliced bolillo (Mexican bread), avocado, with that undeniably-satisfying crunch of cabbage. Images of dancing tortas appeared between my eyes as I tried recalling my dreams. That's when I knew what I was going to prepare for the feast. Others told me they would bring Mexican rice, guacamole, cheese dip, homemade hot sauces (including a new method of clarified hot sauce, more on that coming soon), mango salad, and a tomato black bean salad to accompany. Conditions were perfect.
....and, purely for fun because it crossed my mind, and because I'm a fan, I couldn't help but include this Flight of the Concords clip where conditions were also perfect: Sorry for the random video. It just felt right. Anyway, back to tortas. Rather than make individual tortas, I prepared all the components separately. Everyone chose their own salsas, protein, and stuffings to build individual, customizable sandwiches. Here's a look into the creation of my vegetarian version of a torta. It's loaded with fiber, lean protein, and has a wonderful smoky flavor from the homemade adobo sauce with just a touch of brightness from the tomatillo & jalapeño salsa. A nutritious take on a classic Mexican sandwich that will have you begging for seconds. Diner tested, dietitian approved. vegetarian adobo black bean tortasServes 4 large tortas, or 8 (more manageable) halves Ingredients: 1 cup adobo sauce (recipe below or store bought) 2 cups black beans cooked 2 cups cabbage, shredded 1 tsp salt 1 cup cotjia cheese (optional) salsa jalapeño (see recipe below) 1/2 cup crema* 1 avocado, sliced 4 bolillo (Mexican sandwich rolls) cut in half lengthwise and widthwise *can substitute Greek yogurt or sour cream Directions: Heat the beans in the adobo sauce and keep warm until ready to use. In a small bowl, combine the cabbage with salt. When ready for assembly, in the following order, layer your sandwich in this order: bread bottom, beans, cotjia cheese, salsa, crema, avocado, bread top. adobo sauceThis recipe makes 1-2 cups, which ultimately depends on your desired consistency. Ingredients: 4 dried ancho chiles, stemmed and seeded 2 dried pasilla chiles, stemmed and seeded 2 dried mulato chiles, stemmed and seeded 6 cloves garlic 1 white onion, cut into thick wedges 1/2 cup white vinegar 1/2 cup parsley with stems 1/4 cup oil 2 teaspoon cumin, ground 1 teaspoon coriander, ground Directions: In a 2 quarts boiling water, add the chiles, garlic, and onion. Cook for 30 minutes and puree in a blender with the remaining ingredients. Adjust with chile water until you reach desired consistency. salsa jalapeñoIngredients: 2 jalapeños, stemmed 8 tomatillos, husked and rinsed 1 teaspoon kosher salt 1/2 bunch cilantro 1/4 cup white onion Directions: In a blender, combine all ingredients and allow to chill until ready to serve. Sometimes the end result may be bitter. Feel free to experiment here and adjust the flavor using agave or a pinch of sugar to offset the bitter notes. And be sure to check out my recipe for black beans and burdock for more plant-based protein goodness. swapping out foods
As a dietitian, I counsel people through food substitutions with every patient. Nearly everyone has foods they either need to avoid, or have foods they should limit in their diet. It's helpful to be guided through options, but sometimes having a list you can periodically check can be handy. You'll see a basic list of suggestions here on TCAgenda to make necessary food substitutions. Comment below if you have any addition suggestions of food swaps or questions you'd like ask.
Let it also be known, I am all about flavor. Never would I tell you OR anyone to get rid of something in their diet...unless it's regular soda :-P. The key is moderation and to have variety in your diet. Eat the rainbow and in moderation....and sometimes, if you're like me, you may just not have all the ingredients on hand to make a meal you crave. Perhaps I can inspire you to start creating your own meals, like I did with this new recipe: Pea Pesto & Kale Pasta. I don't often plan my meals, so I'm constantly making food substitutions. In this particular dish, I used brown rice pasta (instead of a wheat-based pasta), pepita seeds for walnuts (I'm allergic), cilantro and mint for basil, and kale from my garden to boost the dish with extra nutrition. vegetarian & gluten-free: pea pesto & kale pasta
Serves 2
Pea Pesto Ingredients 1 cup shelled peas* 1/2 cup pepita seeds 1/4 cup olive oil 4 cloves garlic 2 oz grated Parmesan cheese 1 cup packed cilantro and mint 1 lime, freshly juiced pinch salt and pepper 2 tablespoons dukkah (optional) *you can substitute frozen peas as well Directions: Blanch the peas in boiling water for 3 minutes. Drain, cool, and pulse in a food processor with remaining ingredients until you reach desired consistency. Kale Pasta Ingredients: 4 oz brown rice pasta (or pasta of your choosing) 1 bunch lacinato kale, cut into thin strips pea pesto (see above for recipe) 1 oz Parmesan, grated Directions: Prepare pasta according to package. Drain, add back to pan with kale, and as much pea pesto as you desire. Stir until combined and serve with Parmesan cheese. Sunday funday
It started out like most Sundays: Woke up, brewed a liter of French press coffee, read, and eventually pulled myself out of bed and into less-casual attire. It was time to 'adult'. You know, do the things you're required to do like laundry, pay bills, send important emails, and, if you're like me, run a business (which translates to always being busy). On this particular day, however, I decided to keep my adulting to a minimum and enjoy the rest of the lovely Sunday sun and do a bit of cooking before going on yet another food adventure.
But what to make for breakfast? Biscuits? Soft-boiled eggs? Swirled poppyseed Babka? Wild mushroom frittata? I searched my pantry and refrigerator for ingredients that might grab my attention: "Choose me. No, no me!" They said, "You know you can't resist my fresh, herbaceous charm." And how could I ignore the herbs? They that spoke the loudest of my ingredients, just begging to be used in my next meal. One by one, I reached for them all: one bunch cilantro, two bunches parsley, two limes, and jalapeño and garlic. Into the blender the ingredients went with a pinch of smoked Hungarian paprika, toasted, ground coriander, just a pinch of citric acid (helps preserve the bright green color), a touch of kosher salt and cracked black Tellicherry peppercorn, and a large handful of toasted almonds. As I pulsed the ingredients to marry them in flavor, slowly streaming in the olive oil, I daydreamed of it's use as a dipping sauce for vegetables, accompaniment with mushroom, elk meatballs, and four bean salad. I call this creation: Green Romesco
If you're a romesco purist, I know I have you squawking, "This can't be romesco! Where's the tomato and red bell pepper?" True, there aren't any of those ingredients, but I can't help but think of this as it's younger, spicier sister. You can easily swap out one sauce for another, and it's good to challenge your palate. Sometimes, I'll even add mint, or other hot green peppers -poblano, say- to this recipe to further its complex flavor profile. Regardless, you'll end up drizzling, draping, dashing this sauce on just about anything - from meats to fish to vegetables, and everything in between.
Prepares 2 cups. Ingredients: 1 bunch cilantro 2 bunches parsley 1 lime, freshly juiced 4 garlic cloves 1 tsp Hungarian smoked paprika 1 tsp toasted, ground coriander pinch citric acid 1 whole jalapeño (seeds can be removed) kosher salt and cracked black pepper to taste 1/3 cup almonds, toasted 1/4 cup olive oil water Directions: 1. Combine all ingredients into a blender and slowly add oil and water until you've reached desired consistency.
Last week I was asked to prepare and instruct a cooking class/demo for a group of people just outside of Chicago. They wanted similar flavour profiles to their traditional Mexican fare, but also something new and exciting that wasn't intimidating. Other important aspects of this class were to include low sodium foods, lower fat foods (not to be confused with low fat -simply less animal and more plant based fats), and heavier on fresh produce to demonstrate healthy eating.
The objective was to engage the family in the kitchen and learn a new technique, food item, and/or nutrition information. Considering these requests, my mind immediately went to watermelon, ceviche and grilling. The rest of the menu unfolded itself once I couldn't shake the idea of these foods and cooking methods. Menu:
chicken anticucho
Serves 4
Ingredients 20 oz chicken, bone-in 3 cups anticuchera sauce* Direction: 1. marinate chicken in anticuchera sauce for a minimum of 3 hours 2. remove chicken from sauce and grill for 40-50 minutes, basting as necessary 3. heat sauce and serve anticuchera sauce*
Prepares 3 cups
1 cup pasilla pepper paste (~6 each) 1/3 cup garlic paste 2 tsp. black peppercorn, ground 1/2 tbsp. cumin, toasted and ground 1/2 tbsp. oregano 3/4 cup red wine vinegar 3/4 cup vegetable oil salt to taste Direction: 1. If making chili paste from scratch, begin here by throughly washing peppers. Cut in half and remove seeds and veins. Put chiles in a bowl, cover with water and let soak for 12 hours or overnight, changing water if time/schedule permits during soaking. Once soaked, drain chiles and put in a blender with 1/4 cup boiling water. Blend for 5 min -chili paste 2. If you are not making your own chili paste, start here. Place all ingredients in a bowl and mix thoroughly. Set aside for 3 hours or overnight to marinade.
Pasilla peppers are not the original pepper to this sauce, but to make it Mexican, I swapped out the Peruvian pepper for a mild, low heat pepper, pasilla. The word anticuchos means meat stew, originating in the Andes and is now a popular menu in Peru, Bolivia, Argentina and Chlie, which consists of meats cooked in a highly acidic, vinegar marinade often including dried peppers. Additionally, it is usually served on a skewer with a boiled potato or bread. Feel free to try the skewers vs my method; it's quicker if you're short on time and don't have 40-50 minutes to grill.
Still hungry? Check out other great eats like grilled radish or lotus root, carrot & daikon slaw. After a long day of work, I was finally able to relax. And make LASAGNA! It's one of my favorite dishes to prepare....and eat. Who doesn't love the complexity of a something so saucy and delicious? Do not get frightened by this post; it comes across as intimidating, but need not be. In fact, you could make just one component of the lasagna. Carrot top pesto or tomato sauce is extremely versatile. Put it on noodles, quinoa, raw veggies like radish...the possibilities are endless, really. The noodles can also be made into a different shapes like spaghetti or even ravioli. Now, to being: Squash Noodles: prepares 1 lb pasta, fresh 3 cups flour 2 pinches of salt, kosher 2 eggs 1/2 cup roasted carnival squash 1 Tablespoon water 2 tablespoons olive oil Preparation: When preparing the pasta, keep in mind it's no different than a simple pasta recipe but without the squash. The only additional steps are to roast and puree the squash (allow to cool before use). Make a well with the sifted flour and salt. Crack both eggs into the well, as well as the squash and water. With a fork, slowly incorporate the flour into the egg mixture. As it begins to form a ball, add the oil. Knead for 8-10 minutes and adjust accordingly with flour and water. Allow to rest and cover for at least 30 minutes at room temperature. With your pasta roller, roll out 3 sheets (the size of the pan) for the bottom layer to number 4. The remaining lasagna noodles are best rolled to number 5. Dry and boil for about three minutes. If you don't have a drying rack, improvise. See the pictures below for inspiration. Cool and lay flat (gently brush oil to cooked noodles to prevent tearing). To make it more fun, sip on a beautiful Pinot Noir and take your time. This isn't a race. Enjoy yourself, and your food. Carrot Top Pesto: Prepares about 5 cups depending on desired consistency 1/2 cup toasted, pepitas 3/4 cup dried pie pumpkin seeds 3/4 cup toasted sprouted walnuts 2 cups packed carrot tops (stems removed) 6 cups fresh spinach 1 cup fresh basil 3 ounces of grated Pecorino Romano cheese 8 roasted garlic cloves 1/2 cup grapeseed oil 1/2 cup olive oil 1/2 cup water Salt and Pepper to taste Preparation: Toast all nuts/seeds and blend in processor. Add garlic and pulse, careful not to pulse too much. Proceed and add spinach, basil and carrot tops in batches. Then add cheese. Very slowly pour the oils into the mixture as you process. Add the water the same way, streaming it into the vibrant green blend. Add salt and pepper to taste. Words of advice:
Basic Tomato Sauce: Yields 3 1/2 quarts 1/4 cup olive oil 1 cup onion, diced 2 - 28 ounce cans of San Marzano tomatoes 4 ounces tomato paste 5 cloves garlice 1 pinch smoked Spanish paprika 1 bay leaf 1/4 cup dried basil In a sauce pot, sweat onions in 1 tablespoon of olive oil. Add remaining ingredients and allow to simmer for 60 minutes. Remove the bay leaf and from heat. Puree with an immersion blender and adjust seasonings. Lasagna: Prepares one large 9x13" pan 1 eggplant, flame roasted on stove top then pureed (skins removed) 1/2 kabocha squash, cubed and roasted (350F for 45 minutes with 2 T. oil, salt and pepper) 16 ounces ricotta 2 ounces Pecorino Romano 3 cups shredded mozzarella Pesto Tomato Sauce Heat oven to 375F Oil the lasagna pan and layer the thicker (#4) lasagna noodles on the bottom. Spread the roasted eggplant on the noodles. Follow with cubed kabocha squash. Sprinkle shredded mozzarella cheese, add next layer of lasagna noodles. Spread pesto onto, followed by another layer of squash. Ladle tomato sauce, then top with noodles. Next comes more cheese, the ricotta. Then yet again, a layer of noodles. Put a thin layer of tomato sauce on top the noodles and sprinkle Asiago Romano to finish. Bake in oven for 50-60 minutes, until done. |
Next upMost PopularCategories
All
Follow |
Copyright © 2015 Ranelle Kirchner - All Rights Reserved - Designed by papers.media