chefRDN
  • Home
  • Services
    • Testimonials
  • Blog
  • Recipes
  • Classes x Clubs
  • About
  • Contact
  • Home
  • Services
    • Testimonials
  • Blog
  • Recipes
  • Classes x Clubs
  • About
  • Contact

 The ChefRDN Blog 

Thankful for Squash

11/22/2019

0 Comments

 
Winter squash

Giving thanks and giving squash 

Thanksgiving is less than a week away. Maybe you're one to keep with tradition and use the same recipes over and over -OR- maybe you're looking to put a spin on a classic. If you fall into the later category, and would like to try something so simple and delicious, then look no further: Squash is the theme, and your family will certainly give thanks if you bring one of my favorite dishes, squash agrodolce (scroll down for recipe). This sweet-savory autumn specialty is one of my go-to recipes - requiring very little effort to make, and a short list of ingredients. 

First things first

Before we get to the recipe, some things to say about winter squash:

Evidence shows humans have been eating squash for over 12,000 years. Buttercup, butternut, delicata, hubbard, kabocha, pumpkin, and acorn (to name just a few) are the most notable winter squash varieties. But, here in the Midwest, we are especially blessed: We have a large selection of unique varieties like sweet dumpling, blue hokkaido, "Cinderella pumpkins" like rouge vif d'etampes and long island cheese, red kuri, turban, sugar pie, and white pumpkins. 

Whew, that's a lot. Rather than go into each flavor profile and use, I'll recommend you visit the Spruce Eats, as they do a lovely job explaining the differences and history. 
​
More squash facts

Season: autumn - winter
Taste: starchy to sweet once cooked, nutty
Nutrition: mostly carbs (the healthier ones), some protein, and very little fat
Volume: quiet to moderate
Technique: bake, boil, braise, grill, pickle, puree roast, sauté, steam, stew, stuff 
Favorite Flavor combos:
winter squash + ginger + pear + cinnamon
winter squash + cashews + cilantro + coconut + curry
winter squash + garlic + leeks + olive
winter squash + thyme + garlic + olive + shallots
winter squash + kale + red onion + apples

Build your own recipes by using complimentary flavors from these foods: 
fruit: APPLES, including JUICE & CIDER, dates, fig, pear, quince, raisins
beans (navy, black beans, garbanzo, butter, adzuki)
butter
spices: cardamom, cayenne, CINNAMON, cloves, coriander, CURRY, CUMIN, nutmeg, turmeric, GINGER
nuts: cashews, chestnuts, walnut, pistachio, pecan
veggies: cauliflower, celery, carrot, bell peppers, corn, fennel, kale, leeks, mushrooms
mustard, greens, ONIONS, parsnip, radicchio, potatoes
CHEESE, e.g. blue, cheddar, feta, fontina, Gruyère, mozzarella, Parmesan, pecorino, ricotta, Romano
chiles
herbs: cilantro, mint, parsley, tarragon, thyme, sage, rosemary
COCONUT
eggs
GARLIC
honey
citrus: lemon, lime, orange
maple syrup
mirin
miso
olive
seeds: flax, pumpkin, sesame 
soy sauce
tofu
Photo of squash agrodolce by Ranelle


​Squash Agrodolce 

Serves 8 as a side
3 lbs winter squash (choose a variety: kabocha, delicata, butternut) cut into 1" pieces
2 tbs olive oil 
kosher salt and pepper
2 hot peppers, thinly sliced
3/4 cup red wine vinegar
1/4 cup honey
2 tbsp golden raisins
1 tsp red pepper flakes

Directions:
Preheat oven to 400F
Toss squash in a bowl with olive oil and a pinch of salt and pepper. Lay on a baking sheet evenly and cook until squash has cooked completely, golden brown in color and tender, about 20-25 minutes. If you have many varieties of squash and/or do not cut them into the same size, use separate baking sheets. 

Meanwhile, in a small saucepan, add chiles, vinegar, honey, raisins, and red pepper flakes. Bring to a boil, then reduce to simmer, and reduce until consistency is thick and syrupy, about 10 minutes. 

Brush half of the warm agrodolce sauce over the squash and when ready to eat, top off the squash with the remaining sauce. Finish with freshly cracked black pepper and sea salt. 

Substitutions:
-because we don't always have what the recipe calls for on hand-
red wine vinegar --> cider vinegar --> white wine 
honey --> maple syrup 

Want more? Who doesn't. Check out the recipe vault, or look into other squash favorites like dorayaki and squash lasagna. 
0 Comments

A Historical Look at the Dolma

10/21/2019

0 Comments

 
Picture


​A brief history of the dolma - the "stuffed garden"

The now-ubiquitous dolma has a long and complicated history -  they were first mentioned over two millenia ago, when it appeared as a food in Crete at Knossos, the Minoan palace. After the Turkish conquest of Constantinople in 1453, the dolma became increasingly common fare as the ruling Ottoman Empire expanded.

A dolma, in its most-basic form, is a vegetable or fruit hollowed out, but with the skin intact for nuts, meats, rice, and/or other fruits and vegetables mixed together and stuffed as a filling. Ancient Persian and Greek societies used stuffed vine leaves; the dish then modernized in the 15th century as peppers were substituted for vine leaves.

Initially, dolmas were exclusively enjoyed by the Sultan, his Grand Vizier, and a few other courtiers who had the privilege to dine at the Topkapi palace (see pics below from my recent visit). Many were excited to try something exotic like the dolma, and over time it trickled down to the lower echelons of Ottoman society, and, eventually, to peasant families as well. 

Food is political 

During the 16th and 17th centuries, Suleiman the Magnificent was reining at the height of the Ottoman Empires power, wielding influence and control over much of Southeast Europe, parts of Central Europe, Western Asia, Eastern Europe and the Caucasus, Northern Africa, and the Horn of Africa.

As a major food of Ottoman Empire's "Golden Age" the dolma still holds a strong place in Turkish culture today. It is also an important focal point of the culinary tradition in Azerbaijan - in 2017, it was included into the UNESCO Intangible Cultural Heritage Lists for the country. In some places, however, like Turkmenistan, Kazakhstan, and Uzbekistan, dolmas are now - pointedly - eaten less-often: It is a symbol and reminder of an unsettling part of their history, hearkening back to a time when Turks were mercenaries, and then ruling oppressors, often wreaking havoc and violence in their lands. 
​
Picture
Entrance to Topkapi Palace
A glimpse into the Ottoman Empire from a recent trip to Istanbul.

It is for this reason that we need to be sensitive to cultural viewpoints on food. Food is political. It can often be tricky to navigate - what might to some seem like a simple snack can evoke painful feelings in others. The key is understanding that certain foods, and the preparations of those foods, hold stories that extend far beyond simple sustenance. It is important to remain aware of these histories and connotations, and recognize what a dish or food might represent to certain peoples and culture, before sharing in these traditions yourself.

But food is also meant to be enjoyed - along with the stories it offers to new people and places. We benefit always from the sharing of unique and interesting pieces of culture, and we grow together as a result.

With this in mind, enjoy the recipe for the Minnesota dolma below.
​

Minnesota dolmas

This recipe is an inspiration from my recent trip to the Middle East and The Tiny Mess, a cookbook of recipes and stories from small kitchens. The book was featured as our cookbook club's October choice - be sure and check out the latest club news by signing up for the newsletter. ​

Makes ~30 
30 pickled vine leaves (i.e. grape)
1 1/2 cups wild rice
3 cups water or broth 
1 cup tomatoes, diced
3/4 tsp paprika
1/2 cup olive oil
1 yellow onion, minced
4 cloves garlic, minced
1 cup fresh herbs, chopped (parsley, mint, & dill all work)
1/2 cup nuts, roasted and chopped*salt and pepper to taste
1/2 cup dried fruit (optional, raisins, currants, cranberries)
*Keep it truly Minnesotan by selecting walnuts, hazelnuts, pecans, or chestnuts.

​Directions: 
Combine rice, water (or broth), tomatoes, and paprika in a pot with a pinch of salt. Bring to a boil, reduce to a simmer and cook until rice is tender, roughly 40 minutes. 

Meanwhile, heat 1/4 cup olive oil in a pan. Once hot, add the onions and cook until translucent, then add the garlic. Cook for 1-2 minutes, remove from heat. In a large bowl, combine the cooked onions/garlic with the herbs, nuts, and dried fruit. When rice is finished cooking, drain excess liquid and add to the herbed mixture. Adjust seasonings with salt and pepper. 

Lay each vine leaf flat, smooth-side down, so that the veins are facing upright towards you. Fill each leaf with about 2-3 tablespoons of filling. Fold two sides over the filling. Starting with the edge closest to you, pull the leaf over the rice and tuck tightly before rolling it taut. Repeat with remaining leaves and filling. 

​Serve rolled dolmas with wedges of lemon and drizzle remaining olive oil.
Picture


   Fold edges here -->
Picture
^
After folding sides, roll from the
​bottom up towards the top of the leaf


 <-- Fold edges here

​
​Still hungry? Check out more delicious finds by looking at the recipe vault. These dolmas  pair beautifully with the Baharat spiced potato kibbeh and the lamb kofte. 
0 Comments

Carrots: An Exciting and Delicious Look at the World's Second Favorite Vegetable

9/30/2019

0 Comments

 
Carrots come in all colors


​Carrots in All Colors

Carrots, the second most popular vegetable in the world, are having something of a moment. One might even say we're living in the golden age of carrots, as more varieties than ever are becoming available to the average shopper - including exciting heirloom varieties of antiquity.

First domesticated in Afghanistan, this refined version of Queen Anne's lace, a common weed, first began to spread far and wide during the Middle Ages - available in white, yellow, purple-black, violet, burgundy, and plum. The orange carrots we know and love today didn't become available until the Dutch got ahold of them sometime in the 16th century, as a nod to the royal House of Orange. These - of the Nantes and Imperator varieties - are now the most-common, bright orange with a delicious, earthy sweetness.

There are, however, other types that should certainly cross your palate as well. Here's . quick look at what you'll find at your local grocery, farmers market, or CSA:

Nantes are the easiest for home gardeners to grow. They're sweet and crisp, easy to store, and prefer rocky soil.
  •  ’Bolero': high yielding
  •  ‘Nelson’ : uniform shapes, perfect for eating
  •  ‘Scarlet Nantes’ : sweet, deep orange color
  •  ‘Yaya’: similar to ‘nelson’, but less sweet, good for fall sowing
  • ‘Napa’: resistant to Alternanaria Blight and Powdery Mildew; deep orange; sweet; crisp
  • ‘Touchon’: French heirloom; similar to ‘bolero’; sweet
  • ‘Parano’: early ’nantes’; eat fresh, cooked, or juiced
  •  ‘White satin’: white in color
  •  ‘Merida’: storage-type bred for overwintering; plant in Sept/Oct; sweet
  •  ‘Purple dragon’: longer in size; purple skin with bright orange core, but color fades when cooked; rich in phytochemicals
  •  ‘Kaleidoscope mix’: a mix of 5 varieties
  • ‘Cosmic purple’: violet on outside and orange in middle; retains color when cooked 

Imperator are classic, long, and what you’ll most-often find in stores. They require at least a foot of earth to grow; light, sandy loam soil is best.
  • ‘Autumn King’
  • ‘Atomic Red’: slim, best cooked; retains red color after cooking

Chantenay are short and stout, enjoy heavy or rocky soils, and are incredibly fast-growing.
  • ‘Hercules’: great for rocky conditions or clay
  • ‘Red-Cored Chantenay’: deep-orange; stays sweet when stored

Mini and Radish-style are grown in shallow root zones or in containers. They also perform well in heavy or rocky soils.
  •  ‘Babette’: often served whole with the tops
  •  ‘Romeo’: tiny (1-2”); resembling small beets; rich in flavor

The James Scarlet Intermediate dates from 1870, has a good girth and earthy flavor. Best to sow in May for December harvest.

De Djerba are from Tunisia in shades of violet, black, and orange.

We offer a base selection here to help you consider whether you'd like to grow your own carrots, but there are many more to explore if you are curious. Seed Savers Exchange is one of my go-to places to order seeds, including the aforementioned heirloom varieties. 

You might also be wondering if, other than color and size, there are nutritional differences among each variety....
Imperator carrots come from rocky soil like this


​Nutritional Differences 

And indeed there are. But only slight nutritional differences between carrot varieties. In general, they all contain high levels of vitamin A, are rich in fiber, and have a modest amount of vitamin K, vitamin C, and potassium.  Ultimately, carrots are good for your eyes, skin, teeth, immune system, and digestive health. 

The key is the color. 

Flavonoids found in purple or black carrots have antioxidant, anti-inflammatory, and anti-microbial properties, while some red carrots may have more beta-carotene and lycopene, which is linked to reduced risk of heart disease and some types of cancer.

At the end of the day, however, the health differences really aren't a dealbreaker for any specific variety - just keep eating these crunchy, vitamin A rich beauties and your body will love you for it.

If you need inspiration for how to use them, check out my flavor pairing ideas, along with some of my favorite recipes below: 
​

Carrot Pairings

Chervil
Cilantro
Caraway
Cumin
Honey
Greens: carrot, collards
Mustard seeds
Nuts: almonds, cashews, pistachios, pecans, walnuts
Fruits: apples, apricots, citrus (lemon/orange), dates, pineapple
Other root vegetables: daikon, radish, parsnip
Game meats
Lentils/bean/legumes
Spring carrots pair well with mild meats like chicken and rabbit
You can eat carrot tops as well


...and now for the recipes
​

carrot green salsa verde
Serves 1 cup 

Ingredients: 
1 teaspoon fennel seeds
1 teaspoon yellow mustard seeds
1 teaspoon cumin 
1 teaspoon coriander
carrot greens from 5 carrots (tougher stems removed)
1 bunch cilantro, reserve 1 tablespoon for garnish
2 cloves garlic
1/2 preserved lemon, pith removed (only use peel)
⅓ cup olive oil 
1 teaspoon kosher salt

Directions:
Combine fennel, mustard seeds, cumin, and coriander in a small sauté pan and toast over medium heat for about 1 minute, until toasted and fragrant. Let cool, then finely grind. 

Combine toasted spices, carrot greens, cilantro, garlic, preserved lemon, olive oil, and salt in a food processor. Process until finely chopped but not pureed. 

Serve with assorted vegetables and flatbread OR use as a marinade OR thin with vinegar and oil to use as a salad dressing.
Carrot and ginger soup

potato, carrot, & ginger soup
Serves 4


1 cup barley
1 tablespoon olive oil
2 onions diced
8 carrots chopped
2 pounds potatoes
2 tablespoons ginger chopped
4 cups low sodium vegetable broth
1 pinch salt
1 pinch pepper
1 orange juiced
​
In a pot, add 3 cups water and barley with a pinch of salt and bring to a boil, then reduce to a simmer and cook for 30-45 minutes (pearled barley takes less time to cook because it has less fiber than hulled barley and is less nutritious).

Meanwhile, in another large pot, heat oil and add onions.
Sauté until translucent, then add the carrots, potatoes, ginger, and broth.
Add more water to submerge vegetables if needed. Bring to a boil, reduce to a simmer and cook until vegetables are tender, about 20 minutes.

Puree the mixture in batches using a food processor or blender. You may need to add more liquid (water) for a thinner consistency and easier blending.
Add salt, pepper, and orange juice to taste. Return to stove and keep warm until barley finishes cooking.

Drain the barley when it’s tender, thoroughly cooked, and add to soup.
Looking for more carrot recipes? Check out these spring rolls from a previous post OR check out my next newsletter where I'll be featuring a few more carrot inspired recipes.  
0 Comments

Greens for days

8/16/2019

0 Comments

 
Picture

greeny greens for days on end 

The best part about summer, in my opinion, is the garden bed full of greens outside my kitchen window. I peer down from the second floor and take a glimpse every morning; I can't help but press my lips into a smile as I grind coffee beans for the French-press. After, I walk down the back stairway with scissors in hand to clip a variety of greens for breakfast and, later, lunch. 

Never, ever, will I get enough.

I enjoy the complexity of a bowl of mixed greens: arugula, nasturtium, mizuna, broccoli greens, bibb, and curly endive, just to name a few. Each offers something different for the palate. 

There are days when I'll eat an entire head of lettuce, or 12 cups of assorted greens (if you don't believe me, ask my partner Adi), and I won't realize it until I'm finished feasting. Whether they're mixed with fresh corn, kohlrabi, radish, chickpeas, za'atar, or raspberries - I'll eat them every which way. My favorite lately has been lightly sautéed greens on a mezze platter with cooked chickpeas and shakshuka-spiced carrots, assorted cucumbers, labneh, sautéed radish (with its greens), Jordanian olives (unpitted), Bulgarian feta, and lavash. 
photo by Ranelle: mezze platter
Home Mezze Platter

your turn

I know I don't have to tell you greens are good for you, but I will anyway: They're full of phytochemicals, antioxidants, calcium, vitamin K, fiber, iron, and folate. Low in calories and high in protein per calorie.

Not so sure you can eat them on a regular basis? I bet I could get you to eat my greens - just ask the participants from this month's cooking class I taught at Blue Cross Blue Shield (see list of up coming FREE classes).  On the menu: charred napa cabbage with a miso lime dressing (see below). 

Regardless if greens are new to you OR you're trying to get more in your diet, try some of these simple strategies: 
  • Start small and build your tolerance. Some greens are more bitter than others, so don't feel bad if you don't love them all right away
  • Steam or blanche to lower the intensity of more-bitter greens
  • Pair them with acidic ingredients, like vinegar, to reduce bitterness and allow them to soften
  • Add salt (in moderation, of course) to break down cell walls, making them easier to chew and digest

and now, a recipe

Charred Napa cabbage with miso lime dressing
serves: 4

Ingredients: 
1 head Napa cabbage, cut lengthwise
2 tbsp grapeseed oil 
2 tbsp miso 
1 tbsp butter, softened
1 lime, freshly juiced

Directions: 
1. Heat a large cast iron pan with oil. When hot, add the cabbage, cut side down and cook until it develops char, about 4-5 minutes. Rotate every few minutes until all sides are charred. 
2. Meanwhile, mix the miso and butter until well-combined in a small bowl. 
3. Apply miso butter to cabbage and bast periodically to the cabbage as it is cooking. The total cook time will vary, depending on the heat and size of cabbage, about 10-15 minutes. 
4. When all sides are charred, remove from heat and squeeze fresh lime juice.
​5. Serve. 

Like what you see? Check out a few other posts, like baharat spiced potato kebbeh, or the nectarine, corn, and black bean salad.
0 Comments

berserk for berries

7/13/2019

0 Comments

 
Picture of fresh berries from the garden
photo by Ranelle Kirchner

berserk for berries​

Over the past couple weeks, I have been overwhelmed with the abundance of raspberries from the garden outside my bedroom window. I start my day by wandering to the raspberry bush to harvest a few berries. Carefully, I reach for the ripest of berries. It takes but one delicate pluck of my fingers before it drops into the palm of my hand. One for me, two for yogurt parfaits. One for me, two for Adi's sunflower butter toast...

I simply cannot get enough. 

Naturally, I grab one more raspberry and pop it into my mouth before heading back to kitchen to prepare breakfast. 

raspberry parfait


​​Serves 1
Ingredients: 
6 oz. Greek yogurt, plain 
1/2 cup freshly picked raspberries, rinsed
1/8 cup mixed toasted grains and/or seeds (quinoa, oats, and sesame in equal parts) 
2 sprigs fresh mint, torn

In a bowl, layer in order: Greek yogurt, raspberries, mixed grains/nuts, and finally fresh mint. 

raspberry nut butter toast


​Serves 1
Ingredients:
1 slice seeded whole grain bread, toasted
1 tbsp sunflower butter 
2/3 cup raspberries, rinsed and drained
sea salt 

Apply sunflower butter to toast and top with raspberries. Sprinkle a small amount of sea salt and serve. 

can't stop, won't stop

Why let the fun stop there, I thought. In the spirit of keeping things simple, I decided to puree the remaining 3 quarts of berries to make fruit leather. And what perfect timing: Next week I will be venturing west via Amtrak to Glacier National Park with my favorite human in the entire planet, Adi. We'll be backpacking into the park, hiking 10 miles each day, so we'll need plenty of nourishment to keep us going - check back for updates and more backpacking recipes!

Sure, you can buy fruit leather in the store. Once you discover how easy it is to make, however, you'll think twice before reaching for those Fruit Roll-ups or extra-fancy organic brands. 

The recipe I'm about to share has only 2 ingredients. No corn syrup, dextrose, partially hydrogenated cottonseed oil, citric acid, sodium citrate, acetylated monoglycerides, fruit pectin, malic acid, ascorbic acid, natural flavors, or  artificial colors.

Now, the recipe:

raspberry roll-ups, a childhood favorite

Picture of homemade raspberry fruit roll up
photo by Ranelle Kirchner

​kid tested, mother approved


Makes 4-5 trays
Ingredients: 
3 quarts raspberries
2 tbsp agave

Puree ingredients in a blender until smooth. Pour onto parchment lined dehydrator trays, about 1/4-1/8" thick. If using a fruit leather tray, you may want to lightly apply a neutral oil to keep from sticking. Use a spatula to smooth out evenly. Turn on dehydrator to 135F and heat for 4-6 hours, depending on thickness of your fruit puree. 

When done, peel off tray and roll between parchment to prevent the fruit leather from sticking to one another. 

Still hungry? Check out more raspberry inspirations like my raspberry rhubarb galette.
0 Comments

Buckwheat crêpes, featuring Jen's Jars

4/15/2019

0 Comments

 
Picture

Crêpe basics 

Crêpe (pronounced with a hard e, as in "ep" like depths​ of flavor, not "ape" like in paper), is a French staple, resembling a thin pancake, and eaten throughout the day. When people think of crêpes, they often think of the all-purpose sort, made with eggs and dairy, feather-light and thin. However, crêpes did not start out with those ingredients. In fact, it started out using buckwheat flour, water, and salt.

That's it! They were originally gluten and egg - free ;) 

The original crêpe was made in Breton, in the Brittany region of France. When used in a savory dish, buckwheat crêpes take on a new name called a galette. 

I chose to embrace Breton's tradition and have a go at making three different versions, using buckwheat flour as my base. It's necessary to first try recipes as they were intended, so my first version included the three traditional ingredients: buckwheat, water, and salt. But I also wanted to play with the flavors to enhance and aerate the batter. The second version included 60 g egg and the third version, 60 g kombucha. 

(See recipes below and try them for yourself. Try one or all leave a comment saying which you preferred)
Picture

Crêpe innards 

The next question is: What do I put inside/on these beautiful buckwheat delicacies? 

Answer: I had a home delivery of Jen's Jars (check out the pics below), after getting to know Jen herself, so I knew exactly what I was going to use. She uses (mostly) Minnesota-grown, 100% plant-based ingredients in her products (and no preservatives!). I dove into the Easter basket for the raw cacao dark chocolate spread, first. I then tried a few using the spinach and pine nut pesto. 

I kept it simple the first time, using only fresh pear to accompany the raw cacao spread. I added a combination of fresh and dried cherries to the next batch. For a more savory approach, I made a round of galettes with some with the pesto, adding a tomato-and-beet salad, and another topped with gruyère cheese.

The possibilities are endless: It's been nearly a week, and I still have one pint of batter left. Each time it's different, and it's difficult to say which flavors I like best.... But why choose one when I can have them all?
Picture

buckwheat crépes, the recipe

Makes ~4 cups batter

Version #1 
Ingredients
​250 g buckwheat flour
750 ml water
8 g salt

Version #2
​Ingredients
​250 g buckwheat flour
690 ml water
60 g egg (1 whole egg)

8 g salt

Version #3

​Ingredients
​250 g buckwheat flour
690 ml water
60 g kombucha 
8 g salt

Butter for the coating the pan 

Directions: 
1. Combine all ingredients in a bowl and beat together until well combined. 
2. Refrigerate for at least 3 hours, preferably overnight. 
3. Remove from refrigerator for at least 1 hour before making the galettes/crêpes. 
4. Use a crêpe pan or non-stick pan and heat until it's hot. Wipe out the pan and add a bit of butter. Pour 2-3 ounces into the pan and use a wooden spreader to swirl the batter. Option to add more butter on top, cooking for roughly one minute. Top with filling of your choice and cook for another minute. Option to apply filling later as I did with some salads. Total cook time is about 3 minutes. 
Picture
Picture
0 Comments

baharat spiced potato kebbeh

2/18/2019

0 Comments

 
baharat spiced potato kebbeh, a Lebanese maza specialty
photo by Ranelle Kirchner

baharat, the spice

Baharat means "spice" in Arabic, and is widely used in Middle Eastern cuisine. It's a wonderful blend of spices (see recipe below to try it for yourself) that can often be difficult to find in grocery stores throughout the Americas. The blend varies from region to region, but typically contains black peppercorns, allspice, cloves, coriander, paprika, nutmeg, and cumin. A little goes a long way - if you are one to experiment, less is more in this case.

You'll find this spice blend in a variety of traditional eats like kebbeh (see below for recipe as well), sambusak, chicken skewers, or really any type of meat or rice pilaf. It's also used in marinades,  pastes, soups, and sauces to add an extra smoky, sweet depth to flavor. 

Baharat 

-modified from the featured cookbook club of the month, Together: Our Community Cookbook 

Makes roughly 1/4 cup

Ingredients:
1 tbsp cinnamon, ground
1 1/2 tsp cumin, ground
1 tsp coriander, ground
1 1/2 tsp allspice, ground
1 1/2 tsp freshly ground black peppercorns
1 1/2 tsp paprika
1/2 tsp grated nutmeg
1/4 tsp cloves, ground
1/4 tsp cardamom, ground

Combine all spices and mix until well combined. Store in an airtight container in a cool, dry place.
​

Lebanese maza

baharat spiced potato kebbeh
photo by Ranelle Kirchner
Lebanese in origin, kebbeh is more commonly a meat dish with ground lamb or beef mixed with  bulgur and spices. It can be shaped, stuffed, fried, poached, baked, or eaten raw. Typically, it's accompanied by many other foods as part of a maza, an array of Middle Eastern appetizers. 

Inspired by these flavors and looking to warm up a particularly cold Minnesota evening, I originally made the kebbeh as a side for dinner. Delicious. The following morning, I decided to try something a little different: Top it with an egg and serve with a side salad for breakfast. And, due to only having one egg in the house for two people (my boyfriend Adrian was hungry as well - aren't they always?  ?), I substituted Greek yogurt for another version.

Both were exceptional choices, but if you're pro egg, then go with the sunny side egg. The rich yolky center seeps into the kebbeh and melds beautifully. 

And now, the recipe:

potato kebbeh (vegetarian version)

​Serves 8 slices 

Ingredients: 

1 lb potatoes, peeled and quartered
1 cup bulgur wheat
1 shallot, minced
1/4 tsp paprika
1/2 tsp baharat (see above recipe)
2 tbsp flour
3 tbsp olive oil (plus more for the pan)

Directions: 

Preheat oven to 425F

1. Put the potatoes in a large pot with cold water, bring to a boil, and cook for 20 minutes with plenty of salt. 
2. Soak the bulgur in cold water for 10 minutes, drain well (squeeze out moisture), and set aside. 
3. Oil a 9" pie pan and set aside. 
4. When potatoes are finished cooking, pass through a ricer in a mixing bowl. Combine bulgur, shallot, paprika, baharat, and flour.
5. Press mixture into prepared pan. Score into 8 servings and make a 1/2 inch hole in the center. Fill with olive oil and drizzle remaining on top. 
6. Bake for 35-40 minutes until golden brown and crisp. 

Serve with an egg (or Greek yogurt) and a side salad. I kept the salad simple: shaved radicchio, orange segments, blackberries, and purple radish slices in a red wine vinaigrette. 

Hungry for more? Check out my latest post on citrus to add a little extra flair to winter. 
0 Comments

DIY food gifts

12/22/2018

0 Comments


DIY food gifts

Looking for last minute gifts that are extra special and unique? Try making one of the following food gifts that won't break the bank, and yet show you care.

​DIY gifts are always a hit!
Make each recipe your own. Choose from a variety of vanilla beans and/or alcohol for the extract recipe & different herbs and syrups for the elixir recipe. 
​

Homemade vanilla extract

Picture

​It's as easy as pie...
except not, because it's actually easier!

 Follow these simple steps to make your own extract and gift to loved ones. 

You can use any vanilla bean, but know that each variety will have a different flavor and quality with unique characteristics. Bourbon and Madagascar are common and full bodied while the Tahitian is fruity with floral and Mexican is spicy. Blend different varieties for complexity. And while we're at it, a note about the alcohol. Keep it neutral using vodka OR bourbon, brandy, and rum for a sweeter, caramel flavor. Don't use top-shelf either; inexpensive alcohol works well.

Ingredients:
4-6 vanilla beans*
8 ounces alcohol*

Directions: 
Split vanilla beans half lengthwise. You may need to cut into smaller pieces to fit your jar, so cut according to the size of your jar or bottle. 

Place vanilla beans in a clean jar or bottle, submerge with alcohol. Cover, shake, and infuse for at least one month. Store in a cool, dry place and shake from time to time. 
(option to strain). 

Tie a bow around the neck of the bottle and gift away? If you decide to give as a gift, be sure to write the 'use' date.
​

Mint-honey elixir

Picture

Makes 1 cup 

1/2 cup mint syrup*
1/2 cup honey
2 inch piece fresh ginger, peeled

Directions: 
Put all ingredients into a saucepan over low heat until all ingredients are well-combined. Pour into clean jars or bottles, and store. 
*Mint can be substituted for other syrups as well. Explore your pantry or ethnic stores for other syrup ideas. Mint syrup can be purchased at Middle Eastern grocery store. 

When gifting, consider pairing the elixir with gin or another spirit, club soda, citrus, and/or ice molds.
​
Still hungry? Try gifting a baked good likesourdough muffins or honey cake. 
0 Comments

Dorayaki, a Japanese confection pancake

12/10/2018

0 Comments

 
Dorayaki: A Japanese Confection Pancake
photo by Ranelle

Dorayaki, simple and sweet, best enjoyed with a cup of green tea

Lately, I've been exploring various Japanese foods. Looking for breakfast, one recipe in particular one stood out: Dorayaki. It's appeared in cooking shows, and recently featured in Tasting Table, so I began to grow curious: What was all the hype about? It is just a pancake, after all. Right?

Wrong. 

Dorayaki is not just any pancake. It's one of the most popular Japanese confections, filled with anko, a sweet adzuki red bean paste, sandwiched between two pancakes. 

You heard me. Two pancakes! But they're small.

Typically, the pancakes are quite sweet, so I cut out a lot of the sugar; I don't do well with things that are overly-sweet, especially at breakfast. But if you're looking for the full-on, sweeter pancake made as intended, add the full amount (using 1/2 cup sugar instead) from the recipe below. 

To make things interesting, I chose to make three different fillings. It was too difficult to choose just one: I was initially interested in trying the traditional bean paste version, but couldn't say no to a matcha green tea variation as well. It was around this time that I also noticed the abundance of ripe squash sitting on my kitchen counter, and decided to make a butternut squash filling for a third option.

Before you get off your seat to make some tasty sweet cakes, check out this clip from the popular manga-turned-anime-series Doraemon to get the full sense of what it's like to love dorayaki, below.


... and now the recipe: Dorayaki

Pancake ingredients:
1 1/2 cup all-purpose flour
1/4 tsp baking soda
2 eggs
1/4 cup sugar
1 tbsp honey
3/4 cup milk*
1-2 tablespoons butter
8 oz filling 
*Can use animal or plant-based milk

Directions: 
1. Mix dry all-purpose flour and baking soda in one bowl with a whisk. In a second bowl, whisk together eggs, honey, and milk. 
2. Gradually whisk the wet ingredients into the dry. 
3. In a nonstick pan, apply a small amount of butter. Ladle in a some of the batter into a circle and repeat. Flip after 2 minutes, or until golden brown, and cook the remaining side for 1-2 minutes. The idea is to make them snack worthy and be consistent in shape and size.
4. Work in batches until the batter is finished. 
5. In the middle of one pancake place a dollop of filling in the center. Place another pancake on top and press along the edges to create a seal, enclosing the filling. It's OK if some of the filling seeps out, messy can be good sometimes. 
Dorayaki: A Japanese Confection Pancake
photo by Ranelle Kirchner

Dorayaki filling recipes

Adzuki bean paste filling:
1 cup adzuki beans
1/8 cup sugar

Directions: 
1. Soak beans overnight or for 8 hours.
2. Drain, rinse, and cover with water. Cook for about 45 minutes or until softened. 
3. Puree beans in a food processor. 
4. Heat a frying pan and add bean puree with sugar. Cook until all it's dry and there's very little to no moisture. 

Matcha cream cheese filling:
1/8 cup honey
2 tbsp matcha green tea
8 oz softened cream cheese

Directions: 
1. In a food processor, combine all ingredients until well-mixed. 

Miso pumpkin filling:
2 cups squash, skinned, seeds and guts removed, roughly chopped
1 tbsp yellow miso 

Directions: 
1. In a pot, combine squash with enough water to cover. Cook for about 10-15 minutes until soft. 
2. Puree squash and add miso. 


Still hungry? Check out the miso carrot spread (within the napa cabbage wrap recipe) for another alternative filling.
0 Comments

Your guide to fermenting at home

11/11/2018

0 Comments

 
Picture
 

fermented foods

Kimchi. Sauerkraut. Kefir. Tempeh. Yogurt.

What do these foods all have in common? They are fermented foods that may promote good gut health and weight loss, improve immunity and even allergies. In it's most basic sense, As Sandor Katz explains, "Fermentation is the transformation of food by various bacteria, fungi, and the enzymes they produce." Katz is the expert if you didn't know - He's the author of The Art of Fermentation, and should be on every food enthusiasts bookshelves. It's more informative than recipe-based, designed to introduce and educate one on the variety of fermented foods and beverages.

Coupling Katz with Rene Redzepi and David Zilber's new book, The Noma Guide to Fermentation, will set you up to make a plethora of delicious, nutritious, fermented foods. In Redzepi's book, there's even a how-to guide on building an incubation chamber. I'm still putting together the supplies so that I can make koji. How nerdy is that? Ha! Watch the video below to learn more about koji:
​Koji aside, many fermentations do not require you to create or purchase your very own chamber to ferment at home. In fact, you can make the most basic recipes with just about any vegetable -some fruits too- without any special equipment: All you need is a vessel, scale, salt, and the produce of your choice. Simple.

And there's no need to be afraid of getting started for fear of the wrong bacteria growing: Any microbiologist will tell you that "risky" is not a word used to describe the process of a simple vegetable fermentation. The lactic acid bacteria that is found on all plants develops quite quickly when fermenting, and can out-compete the incidental pathogenic bacteria.

Fear not: When you preserve in brine, things like botulism need not be of concern. 

Here's how it works: When a plant is harvested, it contains many microorganisms that continue to multiply and diversify. Aerobic bacteria get replaced by anaerobes, which includes many different types of lactic acid bacteria. After the plant becomes submerged, fermentation then begins. Carbon dioxide, alcohol, and acetic acid are also produced. 

Enough with the science, let's get to the kitchen and ferment something.
​
Picture
 

fermentation: getting started

Fermenting foods and beverages is not something new. It's been around for centuries, playing an instrumental role in human evolution. 

Fermentation can be summed up with four words: "chop, salt, pack, wait." (Katz). 
  1. ​Chop your vegetable
  2. Salt* chopped vegetables and do one of two things, pound or squeeze until moist or soak in a brine solution for a few hours. 
  3. Pack vegetables into a sterilized vessel and weigh them down below the brine/liquid. I used a plastic zip lock bag and filled with water. 
  4. Wait, taste often, and refrigerate when you're satisfied. 

*salt* means the amount salt = 2% of the total weight of vegetable and liquid. 

As you can see from my pictures above, I chose the brine method. Next time, I'll try grating my vegetables. The objective is to expose as much surface area as possible to pull out the juice from within the vegetable. Clearly, if you take a look at the picture, I couldn't help but ferment the carrot in it's original shape, so I kept it whole. Yes, it will take longer to ferment, but the shape was too gnarly to mess with... The beets were sliced into small quarters, and the remaining carrots were cut into large matchsticks. 

My advice? Keep it simple the first go around. Taste what happens to the food every few days, and when you think it has reached its ideal taste, refrigerate. You can always make another batch and play with spice and aromatics to add to the flavor. 

The point is to get you in your kitchen cooking and experimenting. 

The verdict is still out on all the positive health benefits of fermented foods, but it's certainly a hot topic in the nutrition world, and it  continues to be studied. If you live in Minneapolis/St. Paul, MN, you too could participate in a gut study involving fermented vegetables. Simply contact Ky from GYST Fermentation Bar to learn more about how to join. 


Looking for more inspiration? Check out my Mac 'n' Chi post for more a different way to play with home fermentations. 
0 Comments

I heart TOMATOES

9/10/2018

0 Comments

 
Picture

for the love of tomatoes

Conditions are finally perfect. Not only because the tomatoes are abundantly in season, but also because the weather has turned cool and comfortable - ideal for canning/preserving. Long hours spent over a hot stove in the kitchen is a much more enticing, and bearable, proposition after the sweltering heat of summer has been tamed by the first days of September.

Another pro? This time of year is also when you'll find the the best deals, Your local farmers market should be the first place you visit to purchase tomatoes in bulk. Quarter and half bushels ($15 on average for a quarter) are going to be most affordable and freshest, with a higher nutrient content than what you'll find at the average grocery store.  

Each year, I make around a half bushel of tomato preserves in various forms: whole tomatoes, quartered tomatoes, peeled tomatoes. Hot pepper tomato jelly, and tomapple (tomato, apple) jam. And, of course, a few eaten fresh. It can take several hours to process tomatoes, but more than worth your time. Something new I tried this year: dehydrate the tomato skins and, then grind them into a powder. A dash of flaked lycopene (aka tomato skin) is a great addition to garnish soups, stews, grain bowls, even popcorn, or anything else that could use that little extra something. 

And, while time-consuming, peeling tomatoes is super easy. It can be somewhat dangerous, however, if you're impatient like myself. The heat from the tomatoes after blanching is boiling hot. Wear gloves, tough it out, or wait until they cool down (can put in an ice bath)

​How to peel tomatoes

​1. Score the tomatoes by marking an 'x' using a knife on the butt of the tomato.
2. Bring a large pot of water to a boil and blanche the tomatoes for 30-60 seconds.
3. Remove tomatoes from water, allow to rest and cool (optional).
4. Peel tomatoes from scored end towards the crown. 
5. Dehydrate skins or toss
​6. Process tomatoes 

processing tomatoes

Once you've got those tomatoes peeled, you're ready for canning. It's super easy, but, as I mentioned before, is time consuming. The more often you do it, the quicker and more efficient you will become. There are two methods you can follow: One uses a boiling water method, and the second utilizes pressure canning. 
  • The boiling water bath method is safe for tomatoes, fruits, jams, jellies, pickles and other preserves.
  • Pressure canning is the only safe method of preserving vegetables, meats, poultry and seafood.
Since my dear granny taught me the 'old-fashioned' boiling water bath method and provided me with the pots, I prefer to do it this way. Thus, the recipe I'm providing today, is meant for one using the boiling water method. 

​Prepares 2 each 3/4 lb glass jars. Double, triple, multiply accordingly 
​

what you need

  • 2 lbs tomatoes 
  • ½ tsp citric acid or 2 Tbsp bottled lemon juice to each hot quart jar (I prefer citric acid)
  • Salt, 1 tsp salt to each quart jar or 1/2 tsp salt to each pint jar (if desired)
  • 2 quart glass preserving jars with lids and bands 

directions 

  1. PREPARE boiling water canner. Heat jars in simmering water until ready for use. Do not boil.  Wash lids in warm soapy water and set bands aside. -I like to keep my jars warm by placing them in a 200F oven until ready for use. 
  2. WASH tomatoes. Dip in boiling water 30 to 60 seconds. Immediately dip in cold water. Slip off skins. Trim away any green areas and cut out core. Leave tomatoes whole or cut into halves or quarters.
  3. CUT tomatoes into quarters to measure about 2 cups. Transfer to a large stainless steel saucepan and bring to a boil over medium-high heat. Using a potato masher, crush tomatoes to release juices. While maintaining a gentle boil and stirring to prevent scorching, quarter additional tomatoes and add to the saucepan as you work. The remaining tomatoes do not need to be crushed, as they will soften with heating and stirring. Continue until all tomatoes are added, then boil gently for 5 minutes.
  4. ADD ½ tsp citric acid or 2 Tbsp bottled lemon juice to each hot quart jar or ¼ tsp citric acid or 1 Tbsp bottled lemon juice to each hot pint jar.
  5. PACK hot tomatoes into hot jars to within a generous 1/2 inch of top of jar. Press tomatoes into the jar until the spaces between them fill with juice, leaving 1/2 inch headspace. Add 1 teaspoon salt to each quart jar, 1/2 teaspoon to each pint jar, if desired. Remove air bubbles and adjust headspace, if necessary, by adding hot tomatoes. Wipe rim. Center hot lid on jar. Apply band and adjust until fit is fingertip tight.Place jar in boiling water canner. Repeat until all jars are filled.
  6. PROCESS filled jars in a boiling water canner for 35 minutes for pints and 45 minutes for quarts, adjusting for altitude. Remove jars and cool. Check lids for seal after 24 hours. Lid should not flex up and down when center is pressed.

This recipe is a modification of an original Ball® Fresh Preserving recipe.
​
Give it a try, and let me know what you think! Share pictures and all your stories here. Or have your own favorite way to use tomatoes during this perfect time of year? I'd love to hear about it as well.

And, if you're looking for ideas, check out my pickled watermelon rinds for another unique preservation recipe.
0 Comments

What to do after juicing? Make carrot crackers, of course.

8/22/2018

0 Comments

 
Picture
Juicing was all the rage last year. I still have clients who ask about juicing.

What are the benefits? Should I juice? ​Is it healthy?

My response? When in moderation, it can be part of a healthy diet, especially when you juice at home. It's not as nutritious as eating whole fruits or vegetables, though, as you don't benefit from consuming the pulp (fiber, vitamins, minerals) of the fruit and/or vegetable your turning into liquid. However, you can use the pulp, or produce scraps that separate from the juice. You can bake with them by incorporating into crackers (e.g. as I did in the recipe below), breads (e.g. in a banana or zucchini loaf), or pancakes. Making soup stock from your produce scraps is another great idea, and especially useful come cold weather.

One of my favorite homemade juicing recipes is made with carrot, turmeric root, orange, and ginger. It's not something I prepare often, but when I have the craving (and a refrigerator full of carrots), I dust off my juicer to quench my carrot juice thirst.

Note: You can swap out the carrots for just about any vegetable. Beets, zucchini, and squash are some of my favorite substitutes.
​ 

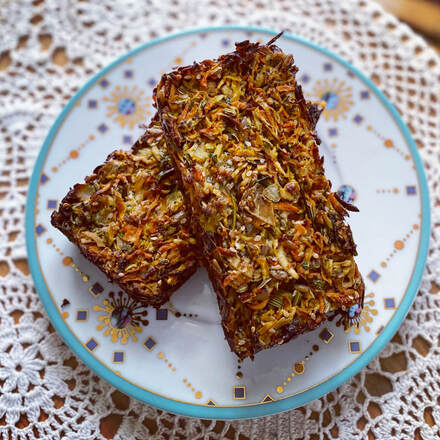
recipe: carrot pulp crackers

Picture
Makes about 50 thin crackers
​
Ingredients: 
2 cups carrot pulp 
1/4 cup ground chia seed
1/4 cup buckwheat flour 
2 teaspoon black peppercorn
2 teaspoon fennel seed
2 teaspoon sesame seed
maldon salt
coconut oil 

Directions: Preheat oven to 325F
In a pan, toast black peppercorn, fennel and sesame until it begins to brown and becomes fragrant, about 3 minutes. 

Grind in a mortar and pestle or spice grinder (I use a dedicated coffee grinder) until it becomes a powder consistency. Mix with carrot pulp, chia, and buckwheat. 

Using parchment or two silpats, brush one side of a sheet with coconut oil using a pastry brush. Working in batches, about 3, roll between parchment (or silpat) using a wine bottle or rolling pin. Roll as thin as possible so that it still holds together, brush with more coconut oil, sprinkle lightly with maldon salt, and bake until golden brown and cooked thoroughly, about 20 minutes. 

When it's cooled to room temperature, break into pieces and serve with meats and cheese, jam, mustard, pickles, or anything else your heart desires.
​
Love carrots? Then you MUST try the carrot, parsnip cake. It's absolutely delicious. 
0 Comments

snap beans & nasturtium

8/6/2018

0 Comments

 
Picture

purple, yellow, or green: all snap beans are welcome

​This side dish is a fantastic way to use up your green beans, and those spicy, sweet nasturtiums that grow without care for other plants. I used yellow wax beans here, but I've also experimented with young scarlet runner beans, and green string beans as well. No two bean varieties taste the same, but they are quite similar and can easily be substituted here, and in like recipes. And, as long as we are on the subject of substitutions, other edible flowers can take the place of nasturtiums in the same way: I recently discovered the lovely taste of pole bean flowers from turtle beans (soft violet) and scarlet runners (crimson red), and they are amazing. They lack the spicy, peppery punch that nasturtiums have, however, so add a few spicy greens (like arugula or mizuna) to round out the flavor. 

bean knowledge

Let's brush up on your bean-age, starting with the basics: All beans are legumes, and are further classified according to whether you eat the entire pod (called snap or green beans) or remove the shell to eat the seeds inside (called shell or dried beans). Only when the beans have a fibrous string running down the bean is it called a string bean. Dozens of green bean varieties exist, but the headliners include: green (or multicolored, snap) beans, haricot vert, scarlet runner, and yard-long beans. To be even more confusing, the yellow snap bean variety is also called a wax bean.

Nutrition-wise, all types of beans are good sources of protein, fiber, potassium, manganese, magnesium, copper, and iron. Try to get in 3 cups a week for optimum health.

​Read more about a bean nutrition overview here. 
​
snap bean & nasturtium salad

​Ingredients: 
4 cups, string beans cleaned
1/4 cup fresh basil, chiffonade (sliced thin)
1/4 cup fresh mint, chiffonade (sliced thin)
1 cup packed nasturtium, flowers and greens removed from stem 
2 tablespoons olive oil 
2 teaspoons champagne vinegar

Directions: 
Bring a pot of water to a rolling boil with a pinch of kosher salt. Add the string beans and cook (blanche) for 3 minutes. Immediately, remove from heat, drain, and cool down the beans under running water. You can add ice to help lower the temperature faster. When it's cool, add the remaining ingredients with salt and pepper to taste.
Serve and enjoy. 
​
If you like this salad, then check out the salad niçoise. It's a game changer. 
0 Comments

how to eat / cook cabbage

7/26/2018

0 Comments

 
Picture

cabbage ins and outs

Cabbage varieties: bok choy, cannonball, choy sum, Chinese/Napa, green, Portugal, red, & savoy -to name a few 
​
Season: summer - autumn - winter
Taste: bitter/sweet, pungent and peppery notes with crunchy flavor
Nutrition: 85% CHO, 12% protein, 3% fat 
Volume: quiet to moderate
Technique: bake, broil, braise, grate, pickle, raw, steam, stuff [overcooking brings out pungent, sulphuric notes]
Flavour Affinities: 
cabbage + apple
cabbage + carrots + ginger + mint + rice wine vinegar
cabbage + ginger + lime
cabbage + potatoes + turnips

Cabbage Pairings: build your own recipes by using complimentary flavors from these foods
APPLES, including JUICE & CIDER
bell peppers
butter
CARAWAY
CARROTS
celery
cheese
cilantro
cream 
dill 
GARLIC
GINGER
HORSERADISH
leeks
lemons 
mushrooms
MUSTARD
nutmeg
OIL, especially OLIVE, sesame, vegetable, walnut
onions
parsley
pepper
POTATO
rice
salads
seeds
sesame
VINEGAR
Picture
grilled cheese with kimchi

how I cook & eat cabbage

  • Grilled cheese & kimchi: just like a classic grilled cheese, but with added kimchi. Serve with wilted greens for balance nutrition.
  • Fermentations: kimchi & sauerkraut [served with maultaschen, a German ravioli; click for the recipe]
  • Stuffed cabbage with veal in a tomato sauce, Polish-style 
  • Cole slaw: red cabbage, apple, cider vinegar, onion
Picture

How do antioxidant properties of raw and processed [i.e. fermented] cabbage compare?

The answer to this question is not simple nor clear, and like most nutrition recommendations, results may vary. Factors that influence the nutritional value of cabbage are based on season of harvest, cabbage variety [red vs. green], amount of salt and time spent in brine, & cooking methodology (Martinez et al., 2009; Chun et al., 2004). However, if one were to compare raw cabbage and sauerkraut using nutrition analysis, one would discover that raw has slightly higher, nonsignificant levels of antioxidants. 

So, how does this all make sense? The key to understanding why the analysis shows a discrepancy is because they are not considering all the factors mentioned above, which can be time consuming, tedious, and maybe impractical. 

Let me sort this out for you. 

After a short review of articles, I can say a few things with certainty: 
  • red varieties have greater antioxidant activity, despite cooking methodology when compared to green varieties 
  • specific types of antioxidants are influenced by processing and packing containers
  • raw, red cabbage varieties have the highest amount of antioxidant capacity (increased capacity=good news; its the response to fight off free radicals)
  • any 100g serving of cabbage can provide a significant amount of antioxidant capacity, 57.1 - 695.6 mg 
In other words, EAT CABBAGE ​
0 Comments

rabbit food

6/5/2018

0 Comments


things are growing...

Seeds are sown, the seedlings are planted, and every morning I rise to look at my plot of greens growing outside my window as I sip my morning coffee. It's easy to tend. The hardest part is waiting for my prized produce to finally appear.

As for my other garden plot one mile away, well, that's another story. That's where they feast. That's where I fight daily for the crop: Me vs the rabbits. 

There's a fence around the perimeter, but that doesn't always keep them out. Can I blame them for wanting to taste the bounty? Truthfully, no, If I tasted those buttery soft leaves of tennis ball greens (lettuce varietal) once, of course I'd keep coming back for more. 

And, luckily, I had the forethought to plant the majority of leafy greens at the plot growing outside my window, where less rabbits reside (at least that I know of). This week, I harvested, and indulged in, French breakfast radish and fresh arugula. 
Picture

No evidence of tampering from neighboring animals noted. Woot woot!

In an earlier newsletter, I highlighted radish and the varietals subtle differences from one another, French breakfast being my favorite: It's got a perfect spicy balance from the first to last bite, and a watery crunch to wash your palate. I enjoy them most on their own with a couple granules of salt crystals and other times over an artisan slice of bread with whipped European butter. Curious? Try it for yourself, recipe as follows:

baguette aux radis

Picture
photo cred: New York Times
​Serves 4
Ingredients: 
1 baguette
4 tablespoons European butter, unsalted at room temperature (see below)
1 tsp flaky sea salt
10 radish, washed, trimmed and thinly sliced
1 cup arugula
1 tablespoons herbs like tarragon, chives, basil *optional 

Directions: 
Slice baguette lengthwise and then into quarters. Spread the butter on one side of the bread, layer on the radish, sprinkle salt over radish, and then the arugula (option to add herbs at this point). Finish with top slice of baguette. Serve.
​

rabbit food, served with European butter

Like I always say: It's about moderation. You should enjoy the foods you love, just be mindful of how much you're eating

I'm a dietitian and diabetic educator, but that doesn't mean I don't like OR don't eat the good stuff. European style butter is made from cultured cream and slight fermentation. This results in a unique flavor with a higher fat content than what you find from most American dairy farmers. There are many to choose from including, Kerrygold, Plugra, President, and Beurre de Baratte. You can order them online or find them at specialty grocers. The object of my desire from these is the Beurre de Baratte. It's made by a young cheese master, Rodolphe Le Meunier, a genuineMeilleur Ouvrier de France making butter the old-fashioned from churning. Everyone raves about this French Normandy butter because of it's unique nutty, umami flavor. It's even wrapped in a gold foil to give you that extra posh at a fancy dinner party. Better yet, it makes an excellent gift to that ultimate foodie friend of yours. 
0 Comments

Herbaceous Charm

3/5/2018

0 Comments

 
Picture

Sunday funday

It started out like most Sundays: Woke up, brewed a liter of French press coffee, read, and eventually pulled myself out of bed and into less-casual attire. It was time to 'adult'. You know, do the things you're required to do like laundry, pay bills, send important emails, and, if you're like me, run a business (which translates to always being busy). On this particular day, however, I decided to keep my adulting to a minimum and enjoy the rest of the lovely Sunday sun and do a bit of cooking before going on yet another food adventure. 

But what to make for breakfast? Biscuits? Soft-boiled eggs? Swirled poppyseed Babka? Wild mushroom frittata? I searched my pantry and refrigerator for ingredients that might grab my attention: "Choose me. No, no me!" They said, "You know you can't resist my fresh, herbaceous charm." And how could I ignore the herbs? They that spoke the loudest of my ingredients, just begging to be used in my next meal. One by one, I reached for them all: one bunch cilantro, two bunches parsley, two limes, and jalapeño and garlic. 

Into the blender the ingredients went with a pinch of smoked Hungarian paprika, toasted, ground coriander, just a pinch of citric acid (helps preserve the bright green color), a touch of kosher salt and cracked black Tellicherry peppercorn, and a large handful of toasted almonds. As I pulsed the ingredients to marry them in flavor, slowly streaming in the olive oil, I daydreamed of it's use as a dipping sauce for vegetables, accompaniment with mushroom, elk meatballs, and four bean salad. 
Picture
photo cred: Sun Basket

I call this creation: Green Romesco

If you're a romesco purist, I know I have you squawking, "This can't be romesco! Where's the tomato and red bell pepper?" True, there aren't any of those ingredients, but I can't help but think of this as it's younger, spicier sister. You can easily swap out one sauce for another, and it's good to challenge your palate. Sometimes, I'll even add mint, or other hot green peppers -poblano, say- to this recipe to further its complex flavor profile. Regardless, you'll end up drizzling, draping, dashing this sauce on just about anything - from meats to fish to vegetables, and everything in between. 

Prepares 2 cups.

Ingredients: 
1 bunch cilantro
2 bunches parsley
​1 lime, freshly juiced 
4 garlic cloves
1 tsp Hungarian smoked paprika
1 tsp toasted, ground coriander 
pinch citric acid
1 whole jalapeño (seeds can be removed)
kosher salt and cracked black pepper to taste
1/3 cup almonds, toasted
1/4 cup olive oil
water 

Directions: 
1. Combine all ingredients into a blender and slowly add oil and water until you've reached desired consistency. 

0 Comments

'nut'ter butter series

1/30/2018

0 Comments

 
Picture

growing up

Even though I'm no longer five, I still enjoy my classic peanut butter and jelly sandwiches, or, even more nostalgic ants on a log as a snack. I'm sure you do it as well, but wouldn't it be nice to jazz it up a bit? After all, food is fun, meant to be enjoyed by you and more importantly, your taste buds. 

(Some of you may remember my 2017 experiments with peanut sauce here: Peanut Sauce)

I've put together a list of my favorite recipes that use nut butter spreads made with atypical ingredients (i.e. not only peanuts). Feel free to mix and match: There are endless nut and seed spreads available for purchase now in local grocery stores, and my hope is that these recipes will expand the way you view the application of them. You can, and should, play around and swap out the 'vehicles' as well, i.e. instead of endive leaves as the base, try apple or cucumber slices. 

​Let's get nutty:

nut butter series

Picture
Peanut Butter Bites
Ingredients:
½ cup peanut butter
1 tablespoon five spice powder
½ cup apple, small dice
4 celery stalks cut into 4” ‘logs’
1 tablespoon celery leaves minced
Directions: 
1. In a small bowl, mix peanut butter and five spice. If it’s too thick to stir, you can add water to thin it out, adding drop by drop.
2. Assembly: on each celery, spread peanut butter leaving enough room to top with apple and optional minced celery leaves.

Sunflower Butter Bites
Ingredients:
½ cup sunflower butter
1 pear, cut thinly into matchsticks
4 radish, pickled or fresh, cut thinly into matchsticks
1 tsp black sesame
25 rice crackers
Directions:
1. In a bowl, mix pear and radish with black sesame.
2. Assembly: on each rice cracker, apply sunflower butter, then the pear/radish mix.

Almond Butter Bites
Ingredients:
½ cup almond butter
½ cup shredded carrot
¼ tsp cinnamon
2 tablespoons raisins
20 endive leaves
Directions:
1. Mix almond butter in a bowl with a couple tablespoons of water if too thick and add cinnamon.
2. Assembly: On each endive leaf, spread almond butter and top with shredded carrot and few raisins.
Picture
What do you make with nut butter? I'd love to hear your ideas! Leave a comment below with your favorite nut butter variations, and don't forget to share this with your friends so they can add their voice to the conversation as well.
0 Comments

spicy black bean salad, family style

7/7/2017

0 Comments

 
Picture
sunset view from the dock

​Preparing food for my extended family has always been a challenge. I'm faced with many picky, meat/potato eaters who don't like many vegetables or foods with 'interesting' flavours. If I want to sneak in veggies or introduce them to a new ingredient, I know I need to be clever or make it similar to foods they typically eat.

This past fourth of July holiday was no different. I knew that if I made something for the family, it couldn't be too bold, had to be approachable, and that I'd need to find out if there were any foods of absolute dislike.

My brother was planning to make brisket in the Green Egg (see below pic) and he was craving a black bean salad to accompany the beef. In the interest of my brothers hankering, I thought why not; it'd be easy to assemble at the lake for a large group of people.

Being over zealous about my salad, I purchased too many vegetables and unknowingly included ingredients the family detested, tomatoes and radish. Remembering my audience, I omitted the unfavorable ingredients and starting prepping. The radish and tomatoes would be better eaten while boating on the lake anyway -healthy treat for me-

Family Conclusion: they absolutely loved it! The salad was versatile and was best enjoyed over a bed of greens -per the ladies of the north- and as a topping to the beef -per the gents-
Many said they were keen to try making it at home, BONUS. 

This brought me such joy, knowing I was able to nourish my family with something they truly enjoyed eating. 

spicy black bean salad

Picture
Serves 4-6
​Ingredients:
1 tbsp olive oil 
1 poblano, small diced
1 jalapeno, minced
1 red bell pepper, small diced
1 yellow bell pepper, small diced
5 cloves garlic, minced
1 tbsp sriracha or hot sauce (optional)
1 tbsp cumin 
1 tsp coriander
1 medium red onion, small dice
2- 15 oz cans black beans, drained and rinsed
2 corn cobs, cleaned corn (see pic for a visual of a simple technique)
2 limes, freshly squeezed juice
1 small bunch cilantro, cleaned and chopped
1/2 cup Cotija cheese (optional garnish)
s & p*

Directions:
1. In a sauté pan, heat olive oil and add poblano, jalapeño, bell peppers, garlic, hot sauce, cumin and coriander. Cook for 5-7 minutes and allow to cool while prepping the rest.
2. In a large bowl, combine red onion, black beans, corn, lime juice, and cilantro.
3. Mix all ingredients together and allow to marinate for at least 30-60 minutes. 
4. Add garnish and serve. 

Recipe: to make this recipe even quicker with less clean-up, don't bother to sauté the garlic and peppers. I knew my family wouldn't like the raw garlicky flavor, so I opted to cook out some of the bitterness. 
Cotija cheese is a semi-hard, cow's milk cheese originating from Mexico. 
s & p = salt and pepper
Picture
lay corn and carefully slice off kernels, rotating cob
If you're interested in learning about bean/legume nutrition with cook times for each variety, click here. Simply scroll down to Beans and Pulses​. 
0 Comments

    Next up

    Most Popular

    Categories

    All
    Backpacking
    Dough & Noodle
    Main
    Nosh
    Sauce Or Spread
    Skin
    Soups & Stews
    Spices
    Sweets

    Follow

Copyright © 2015 Ranelle Kirchner - All Rights Reserved - Designed by papers.media