
I know what I want, and I want it now...pizza pizza
Ok, it starts like this.... I wanted pizza now. Not tomorrow or later tonight, but within the next couple hours. It seems like every recipe says the flavor is best the next day once the dough has time to rest. I didn't have the patience to wait until the follow day to quench my hunger. My craving needed to be had that night. I searched through my old blog and found my potato crust recipe from when I worked at Riverbend, a farm in Delano, MN. However, I didn't have all the ingredients. After looking through my pantry I decided I was going to experiment with two versions, one a classic thin-crust, and two a spelt potato crust. Both are made nearly the same with the exception of the second version where I combined mashed potatoes (red and yukon skin on) at the end.
Instructions:
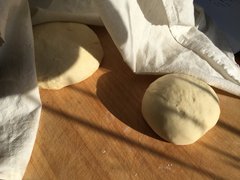
Both versions are the same except for step #3 1. Combine yeast, water and sugar in a mixing bowl, and stir to dissolve the yeast. Allow to rest 5 minutes for the yeast to activate. 2. In another bowl, add your salt and flour(s). 3. Combine wet with dry in a stand mixer and knead on medium speed for 5 minutes or do by hand at least 50 turns. (Here's where you add the mash if you're making version #2) 4. The dough should feel moist and tacky. Allow the dough to rise until it doubles in volume, about 1 hour, covered with a clean kitchen towel. 5. After rising, use the dough or refrigerate. If you choose the later, you must let the dough come to temperature before shaping. 6. When you are ready to use the dough, form one at time (if using version 2). Also, be sure to check that oven....Is it set to 450F ? If you have a pizza stone, put it in the lower middle rack. 7. Form the dough into a large disk and stretch from the middle of the dough outwards on your silpat or parchment. Use the heal of your hand to press and gently stretch until it's 1/4" or less. If the dough starts to shrink, allow it to rest a few minutes and continue rolling. 8. When the crust is thin to your liking, use a bread peel or back side of a baking sheet to slide your pizza onto the pizza stone or sheet pan. Par-bake for 5 minutes. 9. Remove from oven and apply sauce followed by ingredients. Turn down your oven to 400F and cook for another 12 minutes or until the cheese browns. 10. Wait a couple minutes and EAT
You may be wondering, which was better? Honestly, it was a tough decision. I liked the simplicity of the classic. It was certainly crispier and easier to work with; however, the complexity and depth with the added potato was amazing. I think I have to go with version #2.
nom nom Still hungry? Round out your pizza with a salad recipe here.
0 Comments
Leave a Reply. |