 Health and Isolation.COVID-19 has kept many of us in isolation. This can wreak havoc on your overall health, from rising stress levels, to inactivity, to unhealthy eating and drinking habits. It's easy to let yourself go when no one else is looking, but your body is always paying attention. If you don't have the tools to succeed, now is the time to reach out to your local dietitians - like me, for example - to ask what you can do to stay healthy during this time. What to choose?While many were hoarding toilet paper and hand sanitizer, my mind went immediately to fresh produce. My selection of dried grains and beans, vinegars, spices, oils, and other canned and jarred items are all well-stocked - mostly because they usually are: You never know when you'll want to get creative with an oddball ingredient like, say, tamarind paste or flaked green rice. Luckily, I also had plenty of homemade preserved foods, like orange marmalade, kimchi by the gallon, preserved lemons, dozens of canned stewed tomatoes, hot pepper tomato jelly, and an assortment of canned pickled vegetables. As the crowds began to lessen, I made my way to East Side Coop in NE Minneapolis, which is nearby one of my work locations, where the veggies and fruits were pouring from their bins. The aisles of dried goods, on the other hand, were bare and empty, with only a few canned goods remaining. I filled my basket with hearty greens, starchy vegetables (like squash and potatoes), onions, Brussels sprouts, fennel, carrots, and other luscious, plump produce just waiting to be devoured. Afterwards, I went home to further assess my pantry. A few days later, I thought to go to a nearby Asian market, Little Saigon (signage still has the former name, Ha Tien, just fyi), to add a few more items to my kitchen. The shelves there were lush with beans, grains, and shelf-stable foodstuffs - perhaps no one else had thought to look at this local gem? The refrigerators too were flowing with tofu, several varieties of mushrooms (yes, I bought pounds of these to later dehydrate), herbs, and eggplant. I also couldn't resist purchasing a couple packages of rice noodles, and a Bahn mi from the deli (with all the necessary social distancing, of course). Cooking in Isolation.Governor Tim Walz, earlier today (3/25/2020), told the citizens of St.Paul that we will be "sheltering in place" beginning this Friday (3/29) 11:59 PM. For more information on isolation and sheltering in place, watch the video here. Before making one last big run to the grocery store to stock up on what you need, make sure to plan ahead; I'd suggest a bit of meal planning first to understand exactly what you'll need to not only ensure proper nutrition, but also to avoid food waste. Feel free to reference a few of the items I mentioned previously - these things are always good to keep on hand. On that note, one obvious tip is to choose foods that don't spoil quickly. However, this isn't always avoidable. If fresh produce begins to go bad, think of strategies to use them in unique ways, like incorporating your fruits and greens into smoothies, for example, or freezing/preserving for another use at a later date, or in a soup! Another good way to eat well throughout this quarantine is to make it a game. Something I do with my partner Adrian is a game we like to call 'Home Chopped' when we're running low on certain ingredients. If you have ever seen the Food Network show Chopped, you probably understand the concept, but while this is certainly similar, it's also slightly different: In 'Home Chopped' we pool together 8 ingredients that are about to expire, or those we want to incorporate, then, one-by-one, we take turns to select one of the 8 ingredients for the other person. We have 30 minutes to make a dish and then we sit down to eat. Judging is not allowed. In fact, we discourage it. We simply eat, and enjoy the process instead. One more suggestion: Take advice from professionals on YouTube and other social media platforms. They are blowing up with cooking videos. Take a look at how to cook something new, or learn how to perfect a specific technique. You probably have a bit of extra time on your hands as social activities, and many places of work, have been shut down. Learning is important in this time of isolation - knowledge is the only thing that cannot be taken away from you. Take this time to expand your cooking knowledge. And, as aways, reach out to me for recipe ideas, or with any questions you might have. Eating in Isolation.Hopefully you are not completely self-isolated and can be with friends or family at least some of the time. There must be attention on this topic, as, for better or for worse, habits are going to change the more time we spend alone. This includes the things you eat. It's not an easy subject to approach, so I'll expand in a future post, but to be concise, it's ultimately going to affect your relationship with food. Decisions about what you eat can be influenced by your day, mood, budget, access to food, stress, and, simply, how much time you have to sit around. If you don't have someone to enjoy your meals with, I would suggest a virtual dinner date with a friend or loved one to make it more social and a bit less lonely - it's worked for me so far, as I had to do for my birthday last Sunday. Here is a simple recipe to get you started on your quarantine cooking adventure. Leave a comment below and share a few ideas of your own. Recipe: Simple Tahini Kale Salad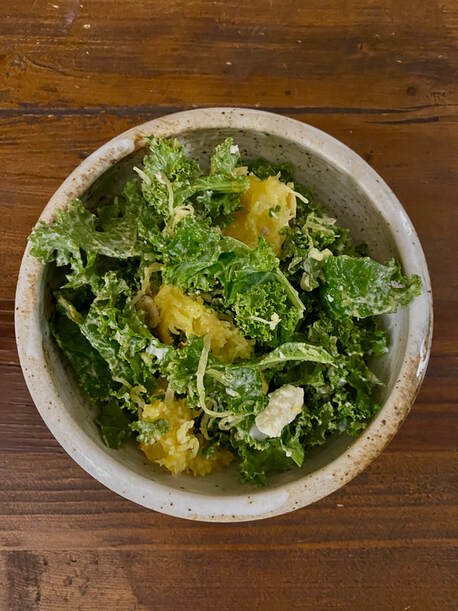 This is a sneak peak from my new Easy Prediabetic cookbook, expected to be released August 2020.
Tahini Dressing Makes 1 cup Prep 5 min 1/3 cup tahini 1/4 cup freshly squeezed lemon juice (about 2 each) 1 tablespoons olive oil 2 teaspoons maple syrup 2/3 cup filtered water Kosher salt Pepper In a small mixing bowl, whisk together tahini, lemon juice, olive oil, maple syrup, water, and salt and pepper to taste. Adjust consistency by adding more water or olive oil. Simple Tahini Kale Salad Serves 2 to 4 Prep 5 to 10 minutes 1 bunch kale, shredded 1 cup cooked squash, cubed or forked (i.e. spaghetti) Tahini Dressing (above) 2 ounces feta cheese, crumbled 1/4 cup raw pumpkin seeds 1/8 cup pickled onions (optional) In a bowl, combine all ingredients: kale, cooked squash, tahini, feta, seeds, and onions. Mix well and serve. If you don't want to eat immediately, this dressed salad will keep for 8 hours. Store the dressing separately if you do not plan to eat the salad that day. Want additional protein? Add shredded chicken, cubed tofu, or cooked beans/lentils as well. Like what you see? Be sure to cook other tasty meals like the Brazilian Fish Stew or the Kofte Be sure to check back for new posts on other Isolation recipes.
0 Comments
|